Filter Menu
Power Tools Filter Menu gives you an easy way to create and manage a filtering type of menu, whereby users can select multiple criteria on which to filter you store's products.
By default Shopify does not include a advanced filtering mechanism, even though it is used by many of the top e-commerce sites worldwide. Shopify does however support filtering by collections and tags, which is the basis for how the Power Tools Filter Menu works.
Because Shopify does not natively support such a menu some changes may be required in the way you structure your collections and product tags to make it compatible with a filter menu.
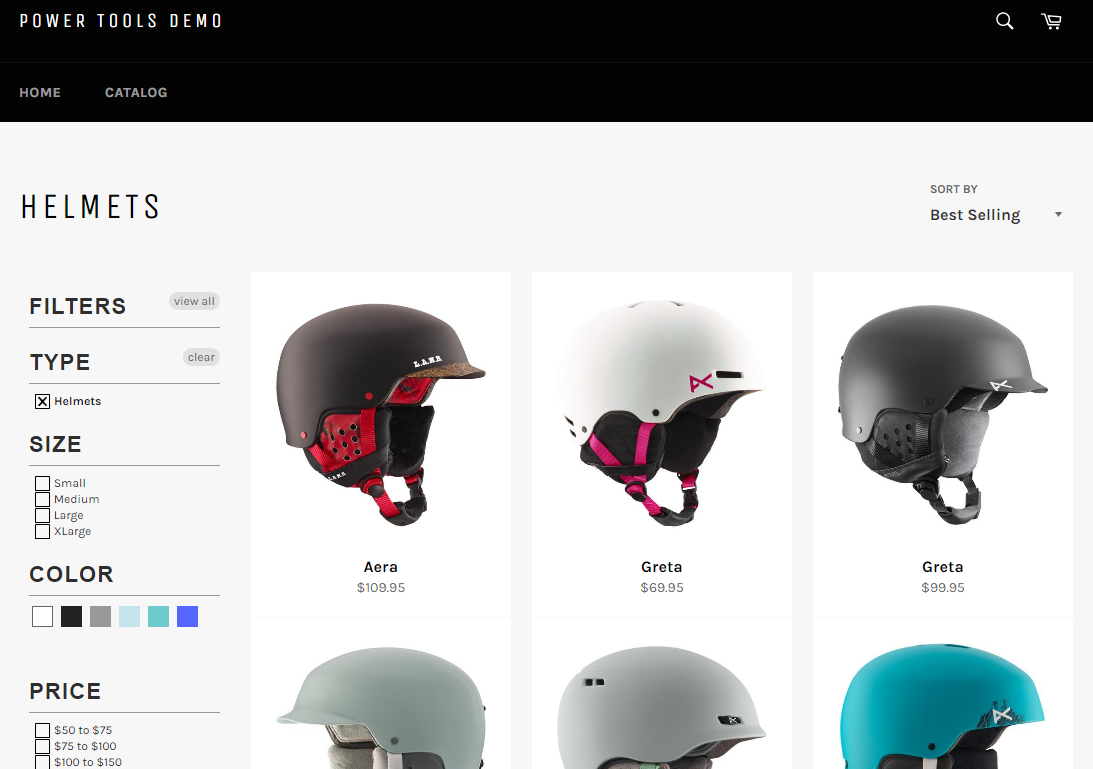
The example above shows the use of custom CSS to style the menu colors.
Technical Overview
There are a small number of rules should be understood before continuing
- Each tag that you plan to filter on must have a corresponding collection, which only contains products with the same tag as the collection handle.
- Tags used for filtering need to be in a 'handle' format, as seen in the address bar. e.g. 'Snowboard Boots' is not correct, 'snowboard-boots' is.
- The title of each filter option is the title of the corresponding collection.
- The menu can only filter using AND style rules, you cannot select multiple items such that it increases the number of products (OR style)
Luckily Power Tools will guide you through the process of ensuring everything is correct, and will even update tags and create collections as needed.
Creating a menu
Step 1 - Define your groups
The filter menu is separated by groups, such as color, price, type, material and size.
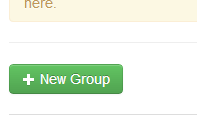
Create a group for each type of attribute you wish to filter on by clicking the 'New Group' button.
There are also helpers in the tabs along the top for creating groups based on price, type, brand/vendor, and variant options (size, color, material, etc.). These are very helpful so we recommend trying them out to start with, as they skip all of the following steps and automate most of the process of setting up a group.
Step 2 - Populate each group with filter options
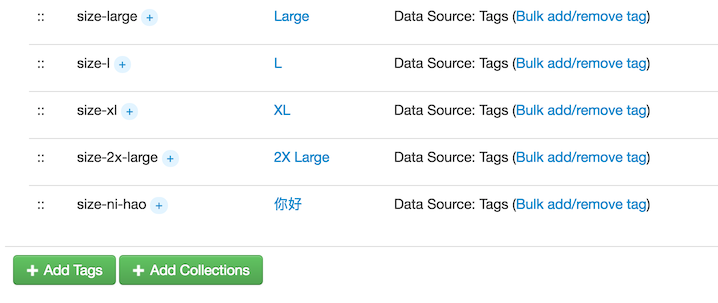
Within each group there are now two buttons to add filters.
If you click on 'Add Tags' it will allow you to enter a list of tags. There are also options for creating matching collections, and prefixing the tags.
If you click on 'Add Collections' it will show you a list of current collections, from which you can select the collections you want to use as filters.
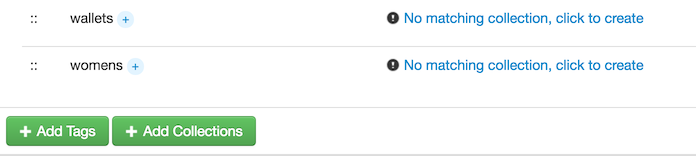
Step 3 - Ensure collection exists
If you have manually entered a tag and there is no collection with the corresponding handle then you will be prompted to create a collection.
This will create a Smart Collection with the rule: tag equals 'your-tag', where 'your-tag' is the tag and collection handle. You will be prompted for a title.
Step 4 - Fix collections
You may receive a warning about the collection if it is not suitable.
There are two types of warnings - Sync tags, and Convert to Smart Collection.

Sync Tags
If you have a collection that is defined by a field that is not the tag, Power Tools will ask you for your permission to edit the tags before you can show that item.
Since the tags and the collection handle need to be in sync, any products in the collection will be tagged with the collection handle, while any products not in the collection will have it removed.
For example, if we had a Smart Collection called 'Under $50' and handle of 'under-50' with a rule for the product price being below $50, every product in that collection will be tagged with 'under-50'. Likewise any product that is tagged with 'under-50' but is not in that collection will have that tag removed. This process will run hourly, keeping your store in sync.
Convert To Smart Collection
You may be given the choice to convert the collection for that tag, athough in some cases it will be your only choice.
This option will take all the items in the collection and apply the tag, then update the collection so that it has only a single rule: tag equals 'tag-abc'.
For example, if we had a Custom Collection called 'Red' with a handle 'red', then converting would tag all the products in the collection with 'red'. The collection would then be converted to a Smart Collection with the rules tag equals 'red'
Choosing which option
Some collections will be given the choice of Sync Tags or to Convert To Smart Collection, and it can have an affect on the maintainance of your products.
Choose the Sync Tags when the collection is defined by a property that is not a tag. Some examples include brands, price or inventory, as these are all additional properties of the product.
Choose Convert To Smart Collection when the best way to define these additional properties is using tags, for example color, size, material.
Step 5 - Save
Once all your menu items have been added and they are all saying ok, press the Save and Update button.
This will start a job that will update your menu on your site.
Note that is may take some time to update all of your product tags on the first run.
Step 6 - Create an All collection
An issue has been identified whereby the default 'All' collection does not behave correctly when reporting tags.
To Fix this create an 'All' smart collection with the handle 'all'. Create a rule that ensures all products are in the collection, such as Inventory level greater than 0.
Updating your site
In order to see the menu you will need to update your theme.
If you would like an expert from Shopify Power Tools can do this for you, simply contact support@powertoolsapp.com, a small fee will apply.
Using the installer
An installer is available, which works for many popular themes. It may however require additional work on the design, which is in your CSS file.
If your theme is not listed then you can use the 'Generic theme', however this will not leave the menu operational and will require further work to place the {% include 'filter-menu' %} command.
Please note the installer will not support all themes due to the huge number of themes available, if you are unsure about your theme please contact support.
Click here go to the installer
Manual installation instructions
You may wish to install the Filter Menu manually, and full step by step instructions for each theme are available in the installer.
Working with variants
Variants, such as color or size, are not able to be filtered correctly with Shopify collections, hence you will see sold out variants in the menu.
There are two possbile fixes:
- Use the Variant Tagger app. Click here for more info. This is the recommended solution, and the Variant Wizard is available to set up filtering by variants easily using this option.
- Delete sold out variants. This can be automated with the Smart Delete app or the Power Tools Suite. Click here for more info.
Hiding and Deleting
When using the Wizards often it may create filters that you do not want to show to customers. In this situation if you delete the row it will come back as the filters are being created based on your products.
In this situation it is best to 'Hide' the row, by clicking on the 'eye' icon next to each filter. The row will then go red and will not be shown to your customers. Make sure you press 'Save and Update' after.
Conditional Filters
The Filter Menu supports only showing a group once a certain filter or one of a number of filters has been selected.
To use this feature click on the 'Hide Until Filters Are Selected' option of the group you wish to hide, you can then select the filters to use as 'parent' filters that must be selected before that group will show.
Tag Aliases
The Menu Menu has a feature that allows you to group together specified tags for use in a single filter by pressing the (+) plus icon next to each filter handle/tag.
This can be used in a number of ways, but the two most common are:
Grouping colors or sizes that are similar. For example lets say you have a number of variations of colors that should all map to a single 'Blue' filter, such as 'Navy', 'Sky Blue', 'Baby Blue' and so on. You can associate each one of these alternative tags to the 'Blue' filter, so when a user clicks on 'Blue' all the blue variations show up.
When setting this up you will want to check 'Hide the matching filters', this will hide any of the alias filters, such as 'Navy', so it won't show as a filter.
This feature works with the Variant Tagger, allowing you to see all of your color, size and other variant options and then map them to a single filter.
Creating 'parent' filters. You can create a new parent filter that is an aggregation or sum of all of the alias or child filters.
This is an easy way to create top level set of filters that contain a number of sub-filters that map directly to each other.
When used in combination with the Conditional Filters system it allows you to create a set of sub-filters that only show when when you select the top level filter, and where the top level filter contains all of the sub-filter products exactly.
Note that for each tag alias you should expect a matching product to be tagged with both tags - the alias tag and the parent filter handle/tag. So in the example above for colors, a Navy product would be tagged with both 'navy' and 'blue', or if using tag prefixes 'color-navy' and 'color-blue'.
Theme Settings
Most theme installers now include theme settings, so you can adjust the look and behaviour of the filter menu without editing any code or CSS.
This is in your theme settings, under Filter Menu.
Issues with other apps
It has been noticed that certain apps can interfere with the filter menu. In some cases this can result in your products being un-tagged and removed from their collections.
Current list of apps include
- Make Model Year Search - this app adds tags for each of your makes and models, so if you have over 1000 models it can cause issues with filtering.
- Genius Collections
- Some inventory management apps overwrite the tags (this can usually be fixed in settings however)
Advanced code
A number of additional helpers are available in the installer, here are some other common examples.
Showing tags in a friendly way
One potential downside of the filter menu is that you need to convert your tags to their 'handle' format, which may not look as nice in a tag cloud.
There is a nice fix for this, as you can use that handle to get the collection and then display the title to the customer.
{% for tag in collection.tags %}
    {% assign tag_collection = collections[tag] %}
    {% if tag_collection.title == '' %}
        {{ tag | link_to_tag: tag }}
    {% else %}
        {{ tag_collection.title | link_to: tag_collection.url }}
    {% endif %}
{% endfor %}